
In a previous blog post, I explained how to set up DocAssist to integrate an approval process between it and Intacct. In this blog post, I'll show you the workflow to ensure the approval process flows from DocAssist to Intacct smoothly.
Setting up the Workflow
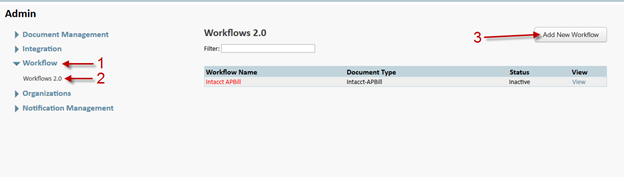
In the admin section of DocAssist click on “workflow”, “workflows 2.0”, and then click “add new workflow” on the right.
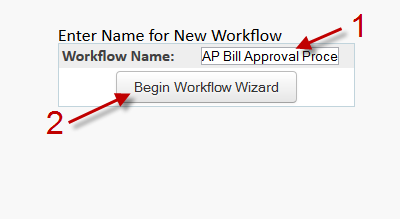
Enter the workflow name “AP Bill Approval Process” and then click “begin workflow wizard”.
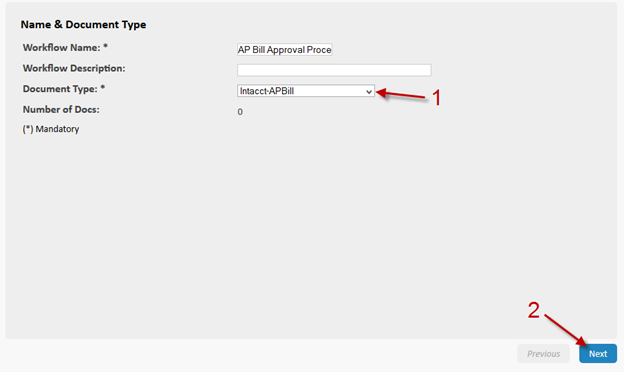
Select your document type from the drop down men and click “next”.
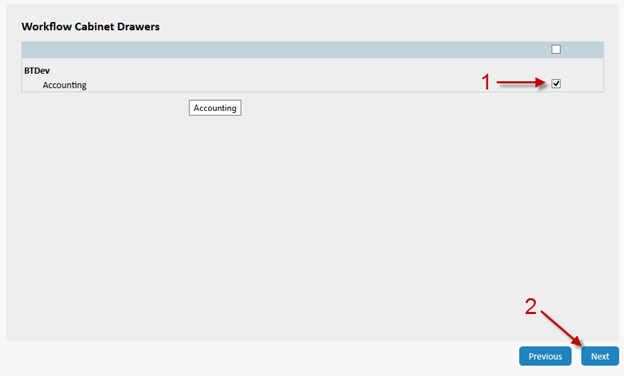
Check the appropriate cabinet drawer and click “next”.
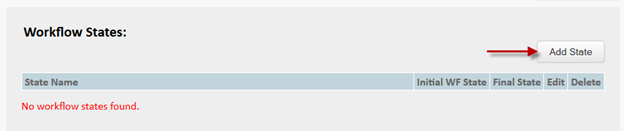
We will create three workflow states. Click on the “add state” button.
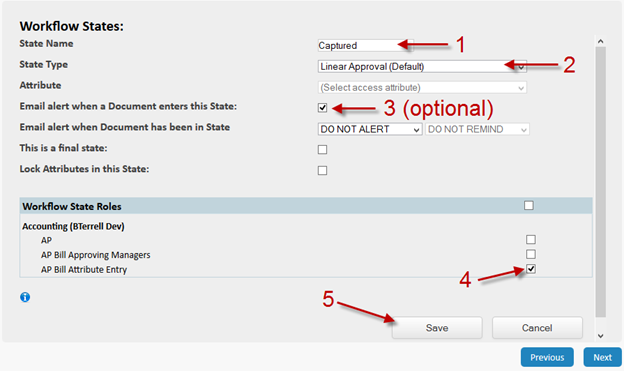
For the first workflow state, enter the state name “Captured”, select “Linear Approval (default)”, if you want the system to email users when a document hits this state then check the email alert check box. Check the “AP Bill Attribute Entry” roll, then click “save”.
For the second, click the “add state” button, enter the state name “Manager Approval”, select “Linear Approval (default)”, if you want the system to email users when a document hits this state then check the email alert check box. Check the “AP Bill Approving Managers” roll, then click “save”.
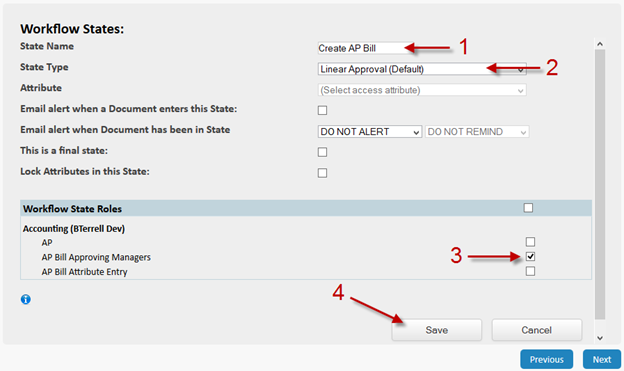
For the third, click the “add state” button, enter the state name “Create AP Bill”, select “Linear Approval (default)”, if you want the system to email users when a document hits this state then check the email alert check box, note that I left the email alert unchecked as this is the final state that gets pushed to Intacct. Check the “AP Bill Approving Managers” roll, then click “save”.
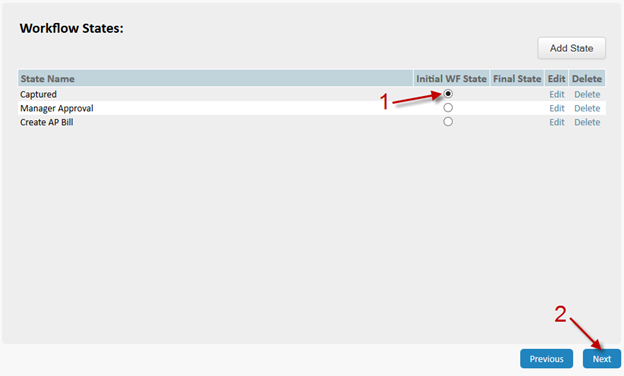
Select “captured” to be the initial workflow state and click “next”.
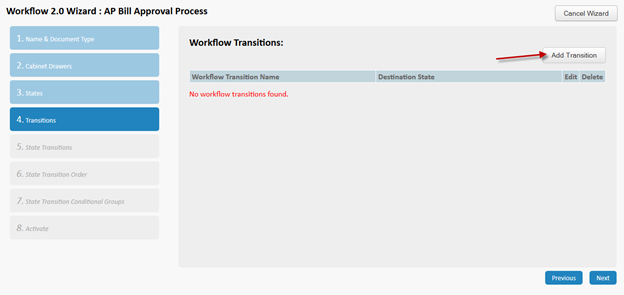
We will set up three transitions, which will be the actions available to users to move documents through the workflow. Click “add transition”.
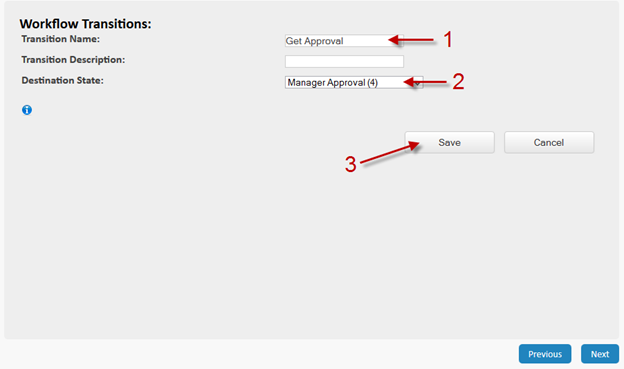
The first transition name will be “Get Approval”. Select the destination state “Manager Approval” in the dropdown box and click “save”. This tells the system that when a user selects the action get approval, the document will transfer to the manager approval state and wait for a manager to review.
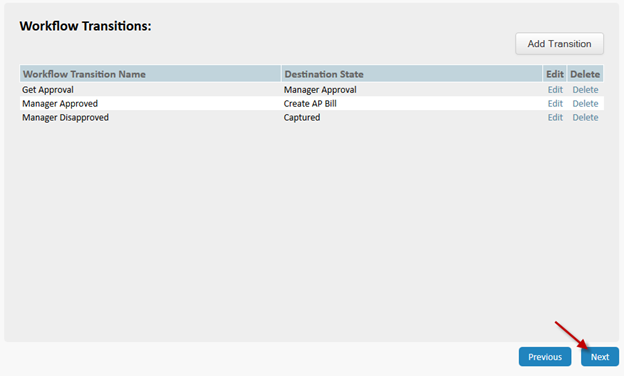
Click “add transition” again and enter the second workflow transition name “Manager Approved” and select the destination state “Create AP Bill” from the drop down and click “save”. This tells the system that when a manager clicks on the manager approved action the document will transfer to the create AP bill state.
Click “add transition” again and enter the third workflow transition name “Manager Disapproved” and select the destination state “Captured” from the drop down and click “save”. This tells the system that when a manager clicks on the manager disapproved action the document will transfer to the captured state.
Review your Workflow transitions and then click next.
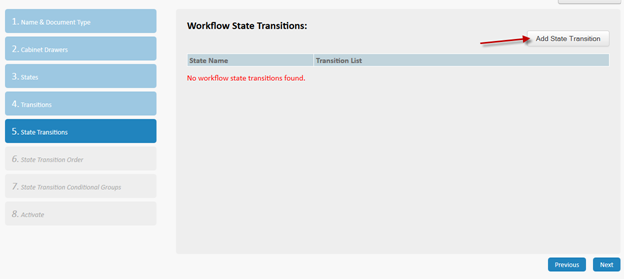
Now we set up the state transitions. These steps will link our states and transitions together.
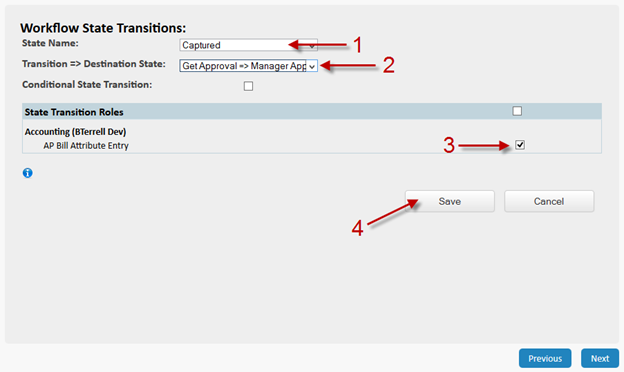
The first workflow state transition will be “Captured” in the state name drop down. Next, select “Get Approval=>Manager Approval” in the transition=>destination state drop down, and click the “AP Bill Attribute Entry” checkbox and click “save”.
Click “add state transition”. The second workflow state transition will be “Manager Approval” in the state name drop down menu. Choose “Manager Approved=>Create AP Bill” from the Transition=>Destination State drop down. Check the “Conditional State Transition” check box, as well as the “AP Bill Approving Managers” check box, then click “save”.
Click “add state transition”, the third workflow state transition is “Manager Approval” in the state name drop down. Choose “Manager Disapproved=>Captured” from the Transition=>Destination State drop down menu and check the “AP Bill Approving Managers” check box and click “save”.
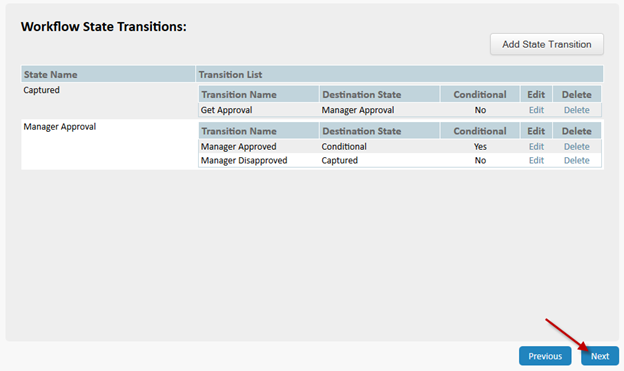
Review the workflow State transitions and click “next”.
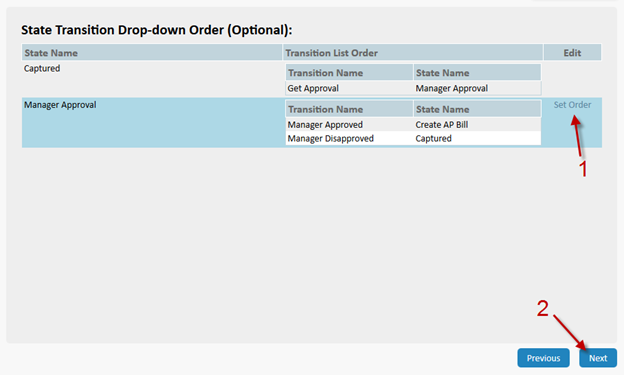
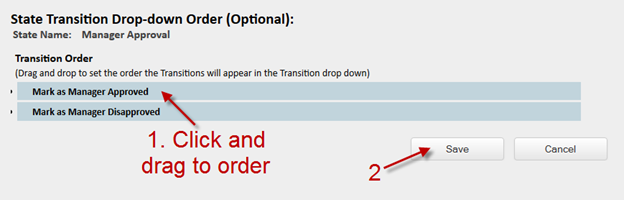
This step is optional, and lets you set the drop down order when users have multiple options. In our case, when managers are reviewing the document, they can approve or disapprove. This menu lets you set in what order those options appear. If you want to set the order click “Set Order” and drag and drop to order the options then click “save”, and click “next” to go on to the next step, otherwise just click “next” to skip this step.
In the next blog post in this series, I will show you how to set everything up to transition into Intacct.

