
Recently, we migrated all our email domains into one Office 365 account. We noticed that the official Microsoft instructions do not take into account an instance when you already have one account and were simply migrating a second account. Their instructions immediately broke the ability for our companyabc.com domain to email our Companyxyz.com domain, as Office 365 refused to look outside exchange and follow the MX records. We had to find a solution, and we think this is something many companies encounter after mergers, acquisitions, etc.
This is a multi-step process involving setting up the emails in Office 365, and updating the DNS to move the emails to the new Office 365 account. This blog will cover how to setup the emails in Office 365, and later posts will show how to migrate the existing emails and how to setup the DNS account. Here is the solution we used, if you have some suggestions, we welcome your input.
Create the email addresses in Office 365
First, you need administrative access to both Office 365 and Gmail, as well as access to your domain provider and the DNS Zone file.
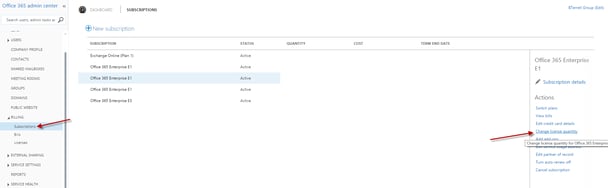
Login into Office365 (O365) as an Administrator, expand the billing, and click subscriptions. Then, select a subscription and click “change license quantity.”
Add to your existing account the number of new mailboxes/users you want to create and submit. This may take 5 - 10 minutes to reflect throughout the system before attempting to adding new users.
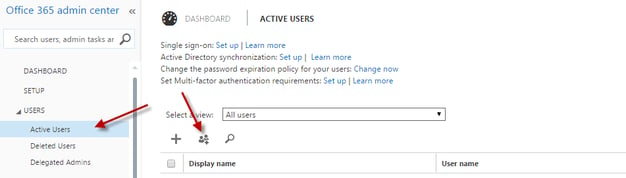
You can add users one at a time or in bulk. Either way, I recommend using the Microsoft-provided .onmicrosoft.com domain when creating the new users, as it aids you in later steps. To find out what your .onmicrosoft.com address is, click on the domains tab in the O365 admin center.

If adding one at a time, go to the Admin Dashboard and Click Add New Users and fill in User details one user at a time.
Follow the on-screen prompts to set the User sign-in status and location, and assign licenses.
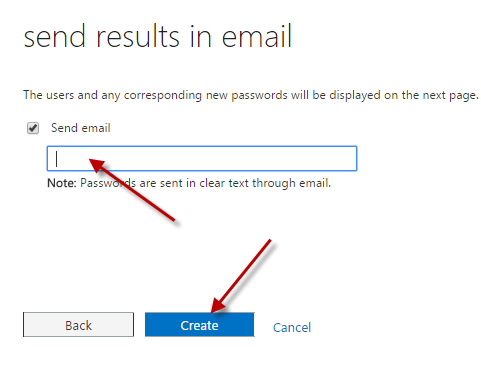
Enter an existing email address to send the new user passwords, and Click “create.” Keep a record of the new users and passwords, as we will need these later. (Please note that the usernames are currently companyabc.onmicrosoft.com, but we will change them to companyxyz.com before sending the information to the users.)
If adding multiple users, Expand the users menu and click active users, then click the Bulk Add icon.
Download a blank CSV file Template and Add the user details and save as a CSV file. Then browse to the file and select it.
- Verify the import passed verification.
- Set the user sign in status and location
- Assign Licenses
Enter an existing email address to send the new user passwords, and Click create. Keep a record of the new users and passwords, as we will need these later. (Please note that the usernames are currently companyabc.onmicrosoft.com, but we will change them to companyxyz.com before sending the information to the users.)
This is the first section of steps to begin the migration. Our next blog post will discuss how to move the exisiting emails from Gmail to this O365 account.

